How Much Does Product Photography Cost?
This is the primary question a lot of brands and marketing professionals ask themselves. And it’s pretty fair, we want to be able to put away the budget for these costs.
But the most irritating of all is when we approach a photographer’s website and pricing rates, we don’t normally see the exact amount of prices for, let’s say, 10 photos or 30 photos, and we always have to email or fill out a form before they can even give us a proper quote.
And if you’re like me, I like to shop around prices before I am ready to purchase just to see how much I should expect and need to save for this cost. And sending an email or filling out a form is just way too much commitment. Not to mention the calls you get from their sales team pushing you to purchase when you’re not actually ready just yet. You just want to avoid all that hassle.
Why can’t commercial photographers just put up their prices up front?
I have been on your side of the story. Maybe not with photography but will construction works I need done or a custom website I need developed.
The thing about custom quotes is, they are custom. Which means, it is tailored to your needs and your needs only.
This is the same reason why commercial photographers rarely give you fixed prices. And if they do, they are either inexperienced or the photos you are getting are similar to other brand’s photos and set-up.
I used to create fixed pricing for my photography services during my first year in the business. But this is where I realized that this type of pricing structure is not sustainable. I later realized that Brand A and Brand B have different needs and to price them equally for the 10 photos they are getting doesn’t really help me break even because Brand A might require 10 days of work whereas Brand B requires 15 days of work.
There are so many factors that need to be considered when pricing for a commercial product photography work. Here are a few of the many based on situations and needs.
Your product
The style of your photos
Additional Costs
Location and Studio Costs
Licensing
Your product
Believe or not, the size, type, packaging material of your product actually affects how long a product photography job can take. Reflective products are a photographer’s nightmare and I’m sure if you have tried to take your own product photos, you realized this was a nightmare too and so now you are looking for someone to take that stress over.
Silicone products are hard to glue. A lot of the time, when styling products, us photographers position the products in different ways that may require us to glue and stick the products in place. But silicon materials do not glue with regular glues and tapes, you need a special silicone glue to make it work and even then, we don’t want these permanent glues damage our props and backdrops so depending on the product, there’s a lot of problem solving that happens in the studio to make that work.
Another example is the size of your product. Smaller products are obviously easier to work with but the larger the product is, the more expensive the set-up is going to be because everything needs to accommodate the size of the products including but not limited to props and backdrops.
The style of your photos
The reason for product photography is to differentiate you from other brands and to make your product stand out in the market. One way we can do this is to identify your branding and the style you want your photos to have. Each brand will have their own style and personality that we capture through their product photos. But each style also have unique needs and requirements to pull off.
Now, there are an unlimited amount of styles out there and you can be as creative as you want. But we technically segregated the most popular styles we get asked to do or voluntarily do as product photographers. In my business, collabarts, I grouped these styles according to the amount of work needed for it to pull off.
Here, I will explain the differences of the amount of work needed for each photo.
Let’s break down this photo.
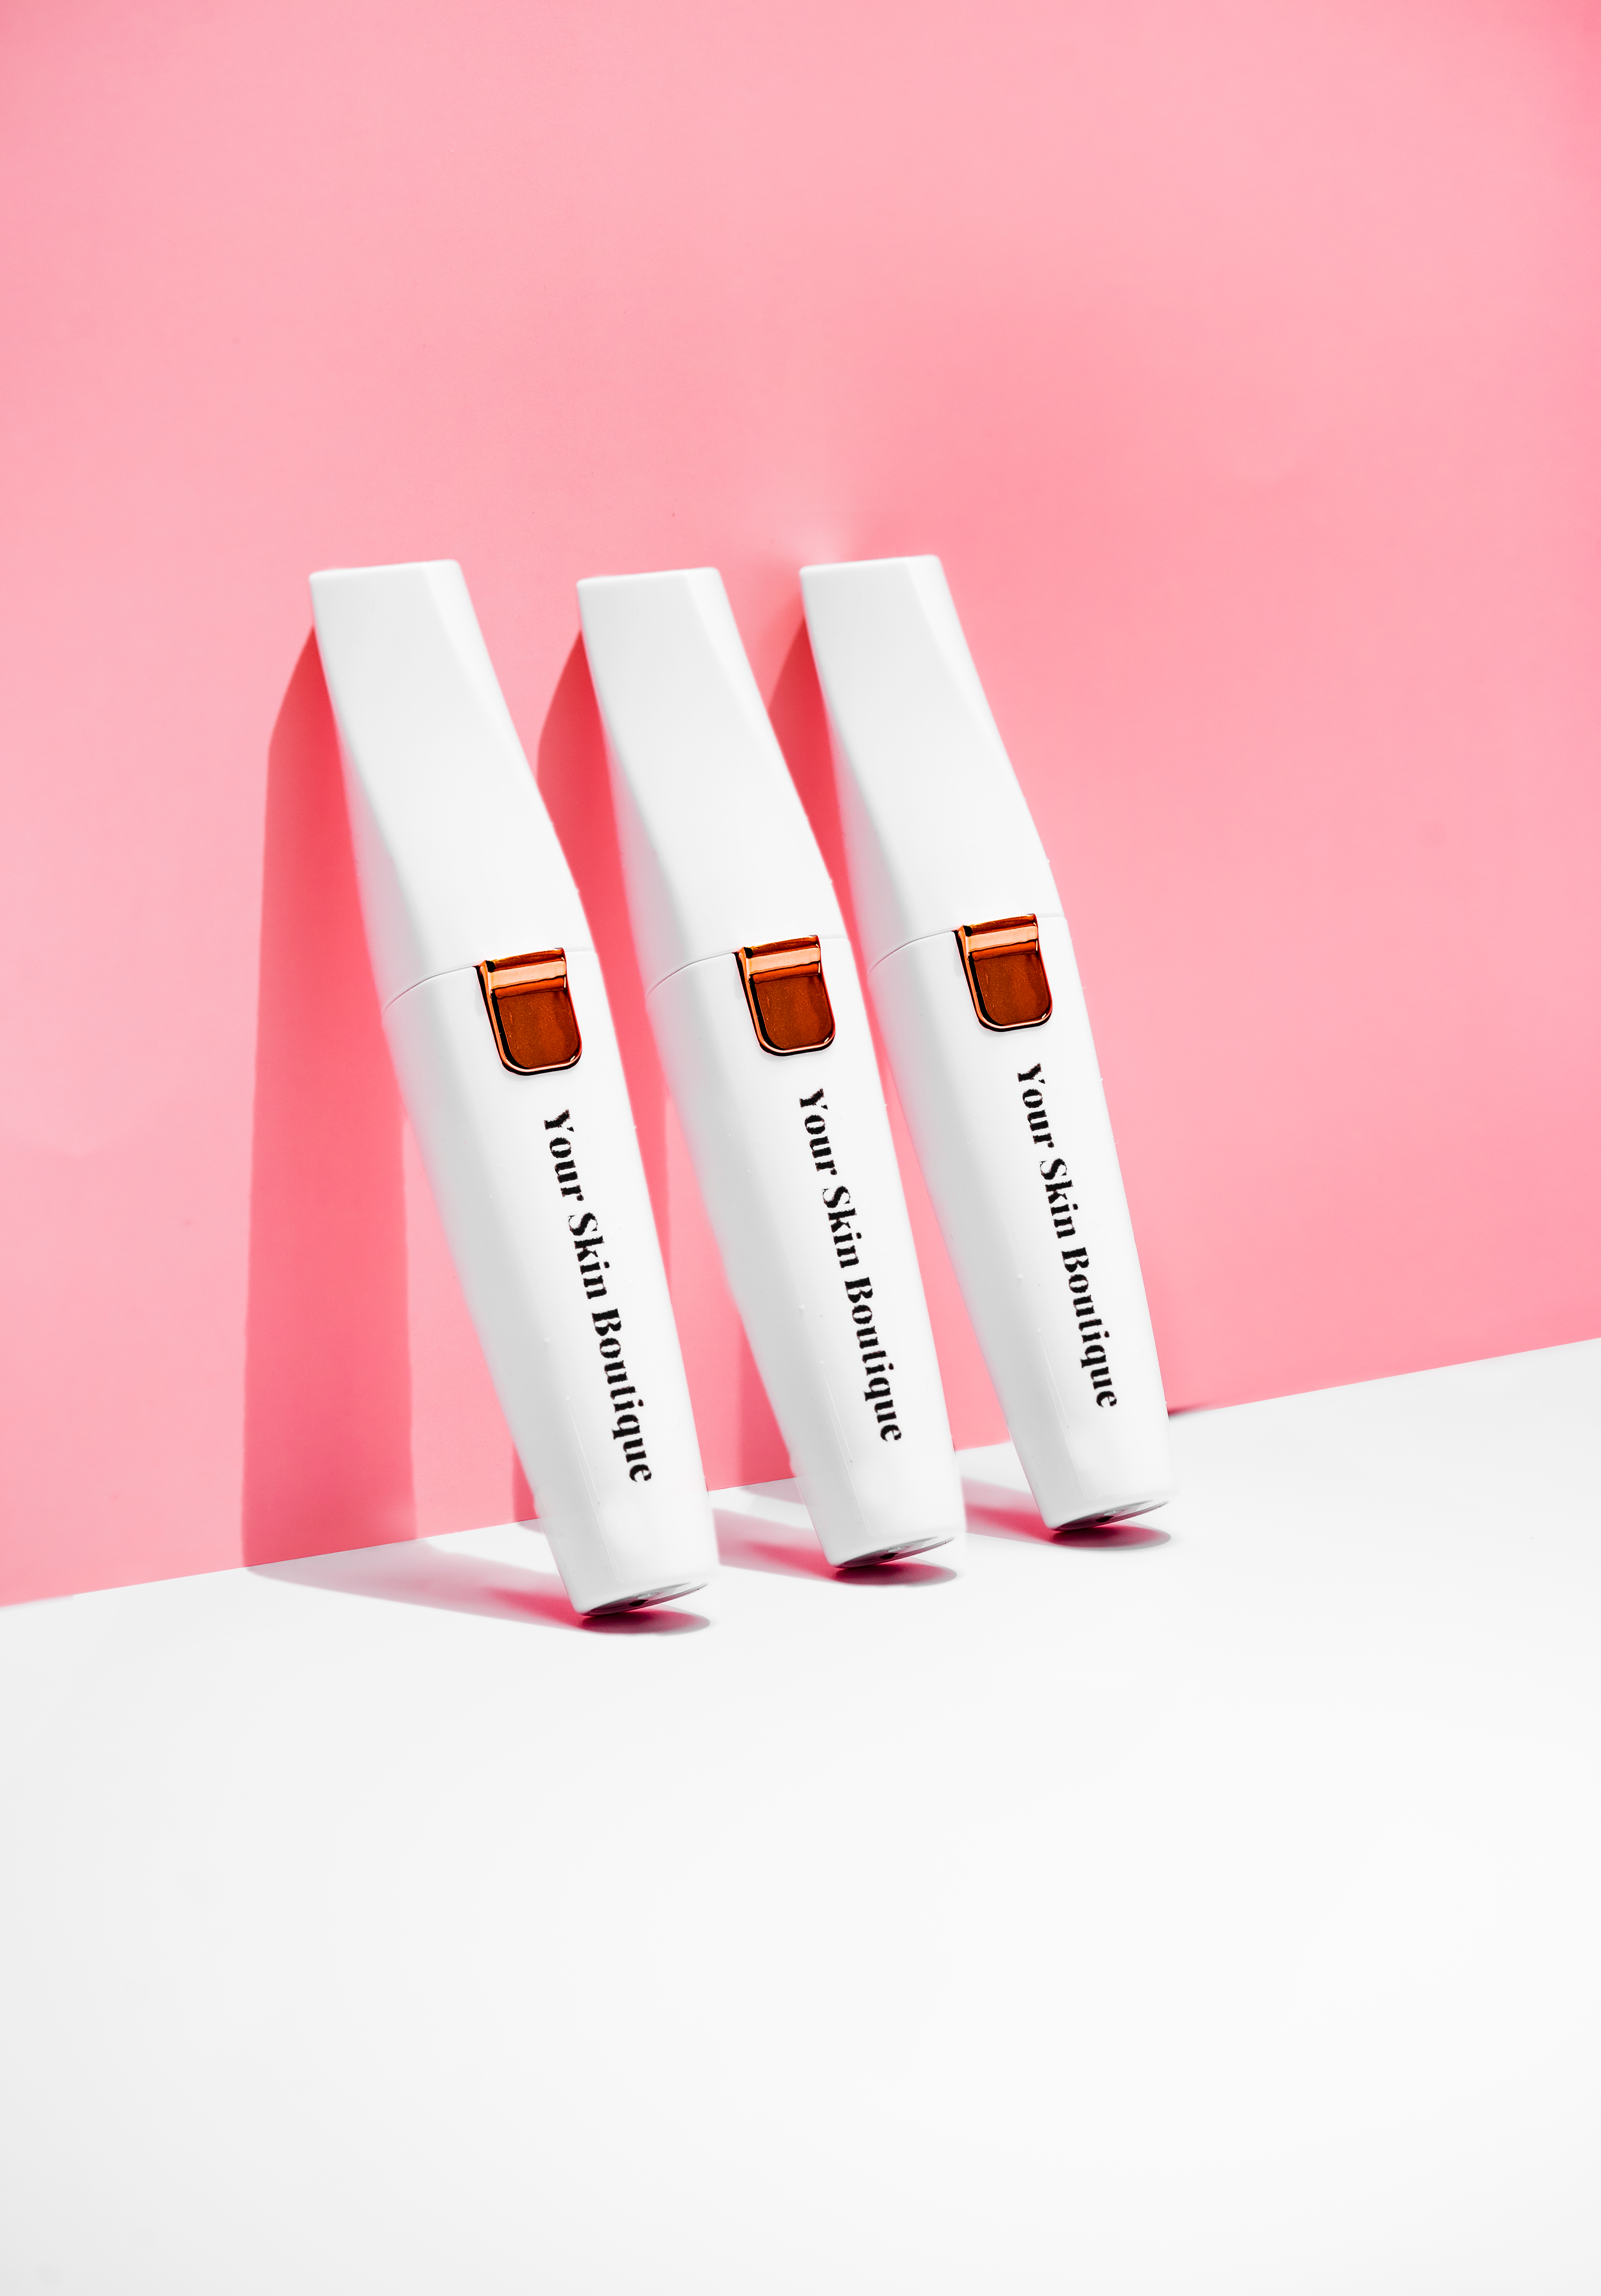
As you can see, we used 2 different backdrops here, white for the ground and pink for the wall. We placed the products leaning against the wall and used a hard light to create the crisp shadows you see in the photo.
Pretty easy set-up that usually takes less than 30 minutes to do for 1 photo, not including the initial studio set-up (unpacking lights, etc).
Let’s go to the editing room and all you really need to do is to clean up the photo, removing dust and scratches. Fixing the lights, colours and adjusting the contrast of the photo.
Again, pretty easy work that requires less than an hour for 1 photo.
Now, let’s move a level higher than the previous photo.
Let’s break down the style of this product photo.
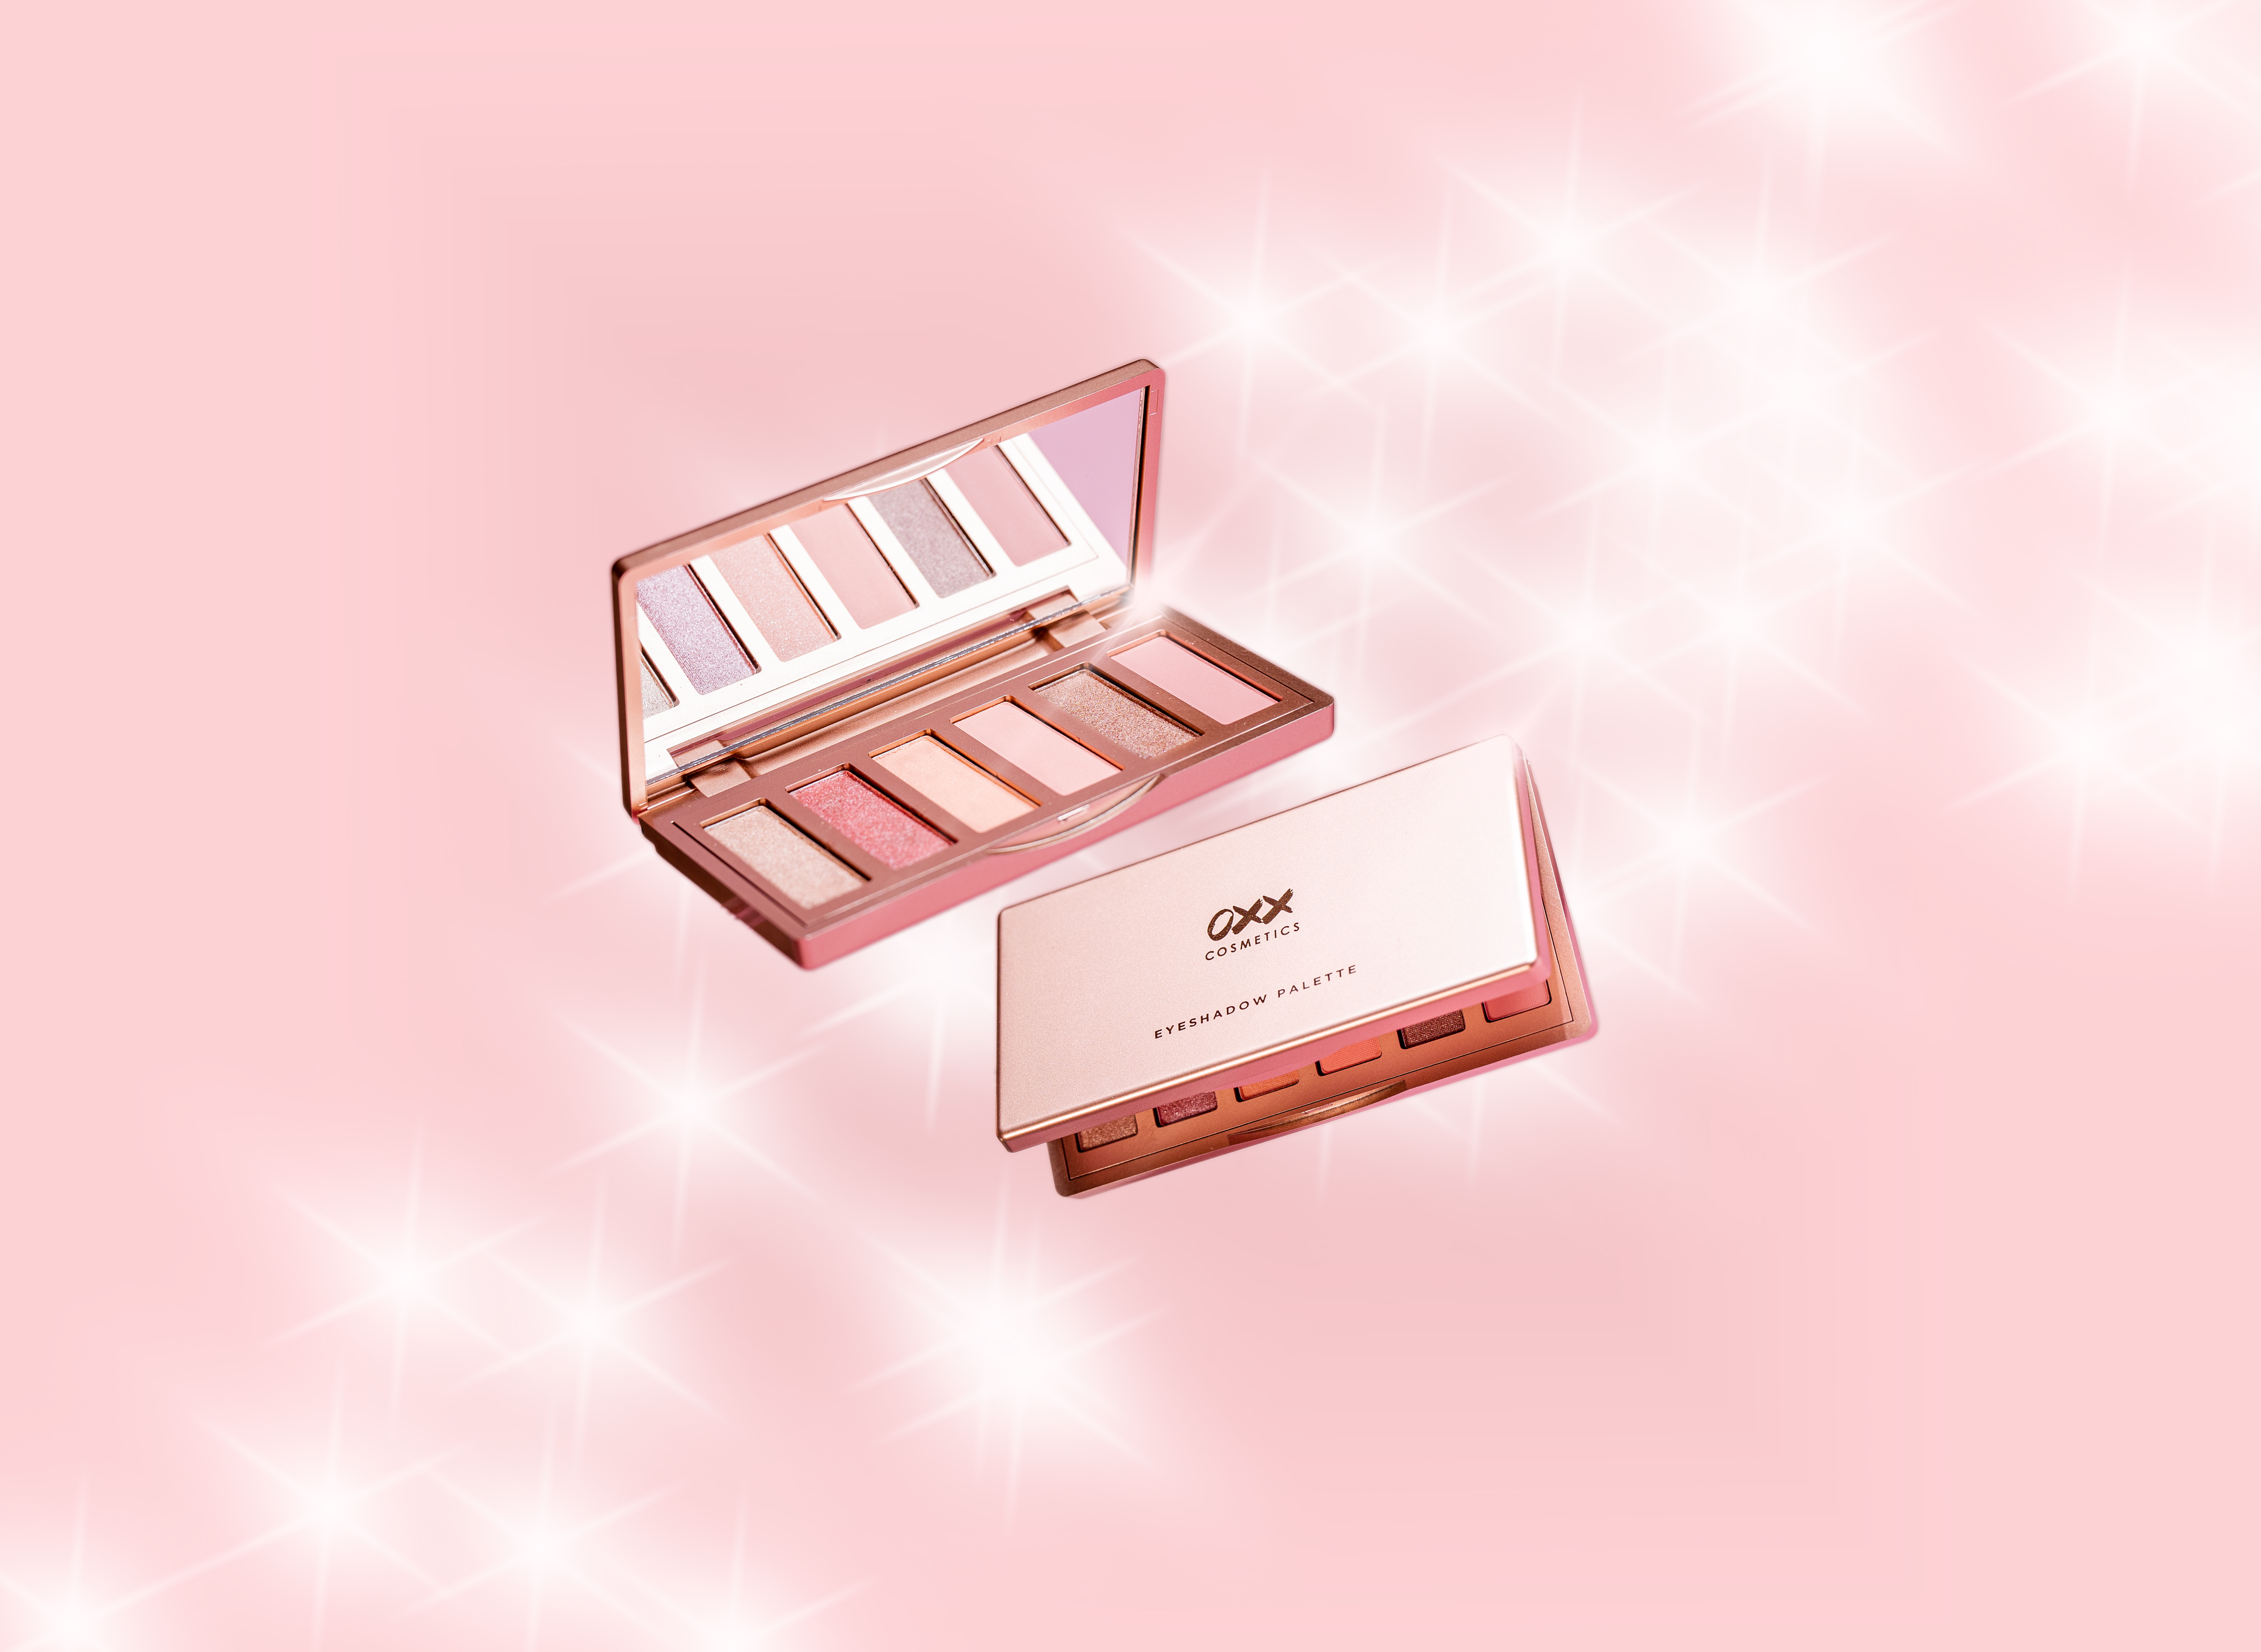
The product is floating, therefore, we need to make this product suspend in the air but unless you live outside of earth, that is technically impossible to do without a magic trick in the studio and in Photoshop.
To do this photo, we will attach the product to anything that can hold it, let it be an acrylic rod, a stick, etc. and remove those attachments in photoshop in addition to all the clean up and correcting edits you do when editing the final product photo.
That’s a lot more work to do than just laying a product in flat lay and cleaning up the photo. A lot of time is spent in making sure the product will be positioned exactly how you like it because gravity can be pretty annoying sometimes. This is a small product and therefore, easier to maneuver around.
The amount of work needed to pull this off in production would be around an hour if we’re lucky and everything goes well or more than that if the product is giving us issues we never anticipated.
In post-production, a lot of cleaning is done to the photos to create this magic trick and it could take more than an hour to do.
Now, let’s go another step higher and breakdown this very popular photo we did for Skin Juice.
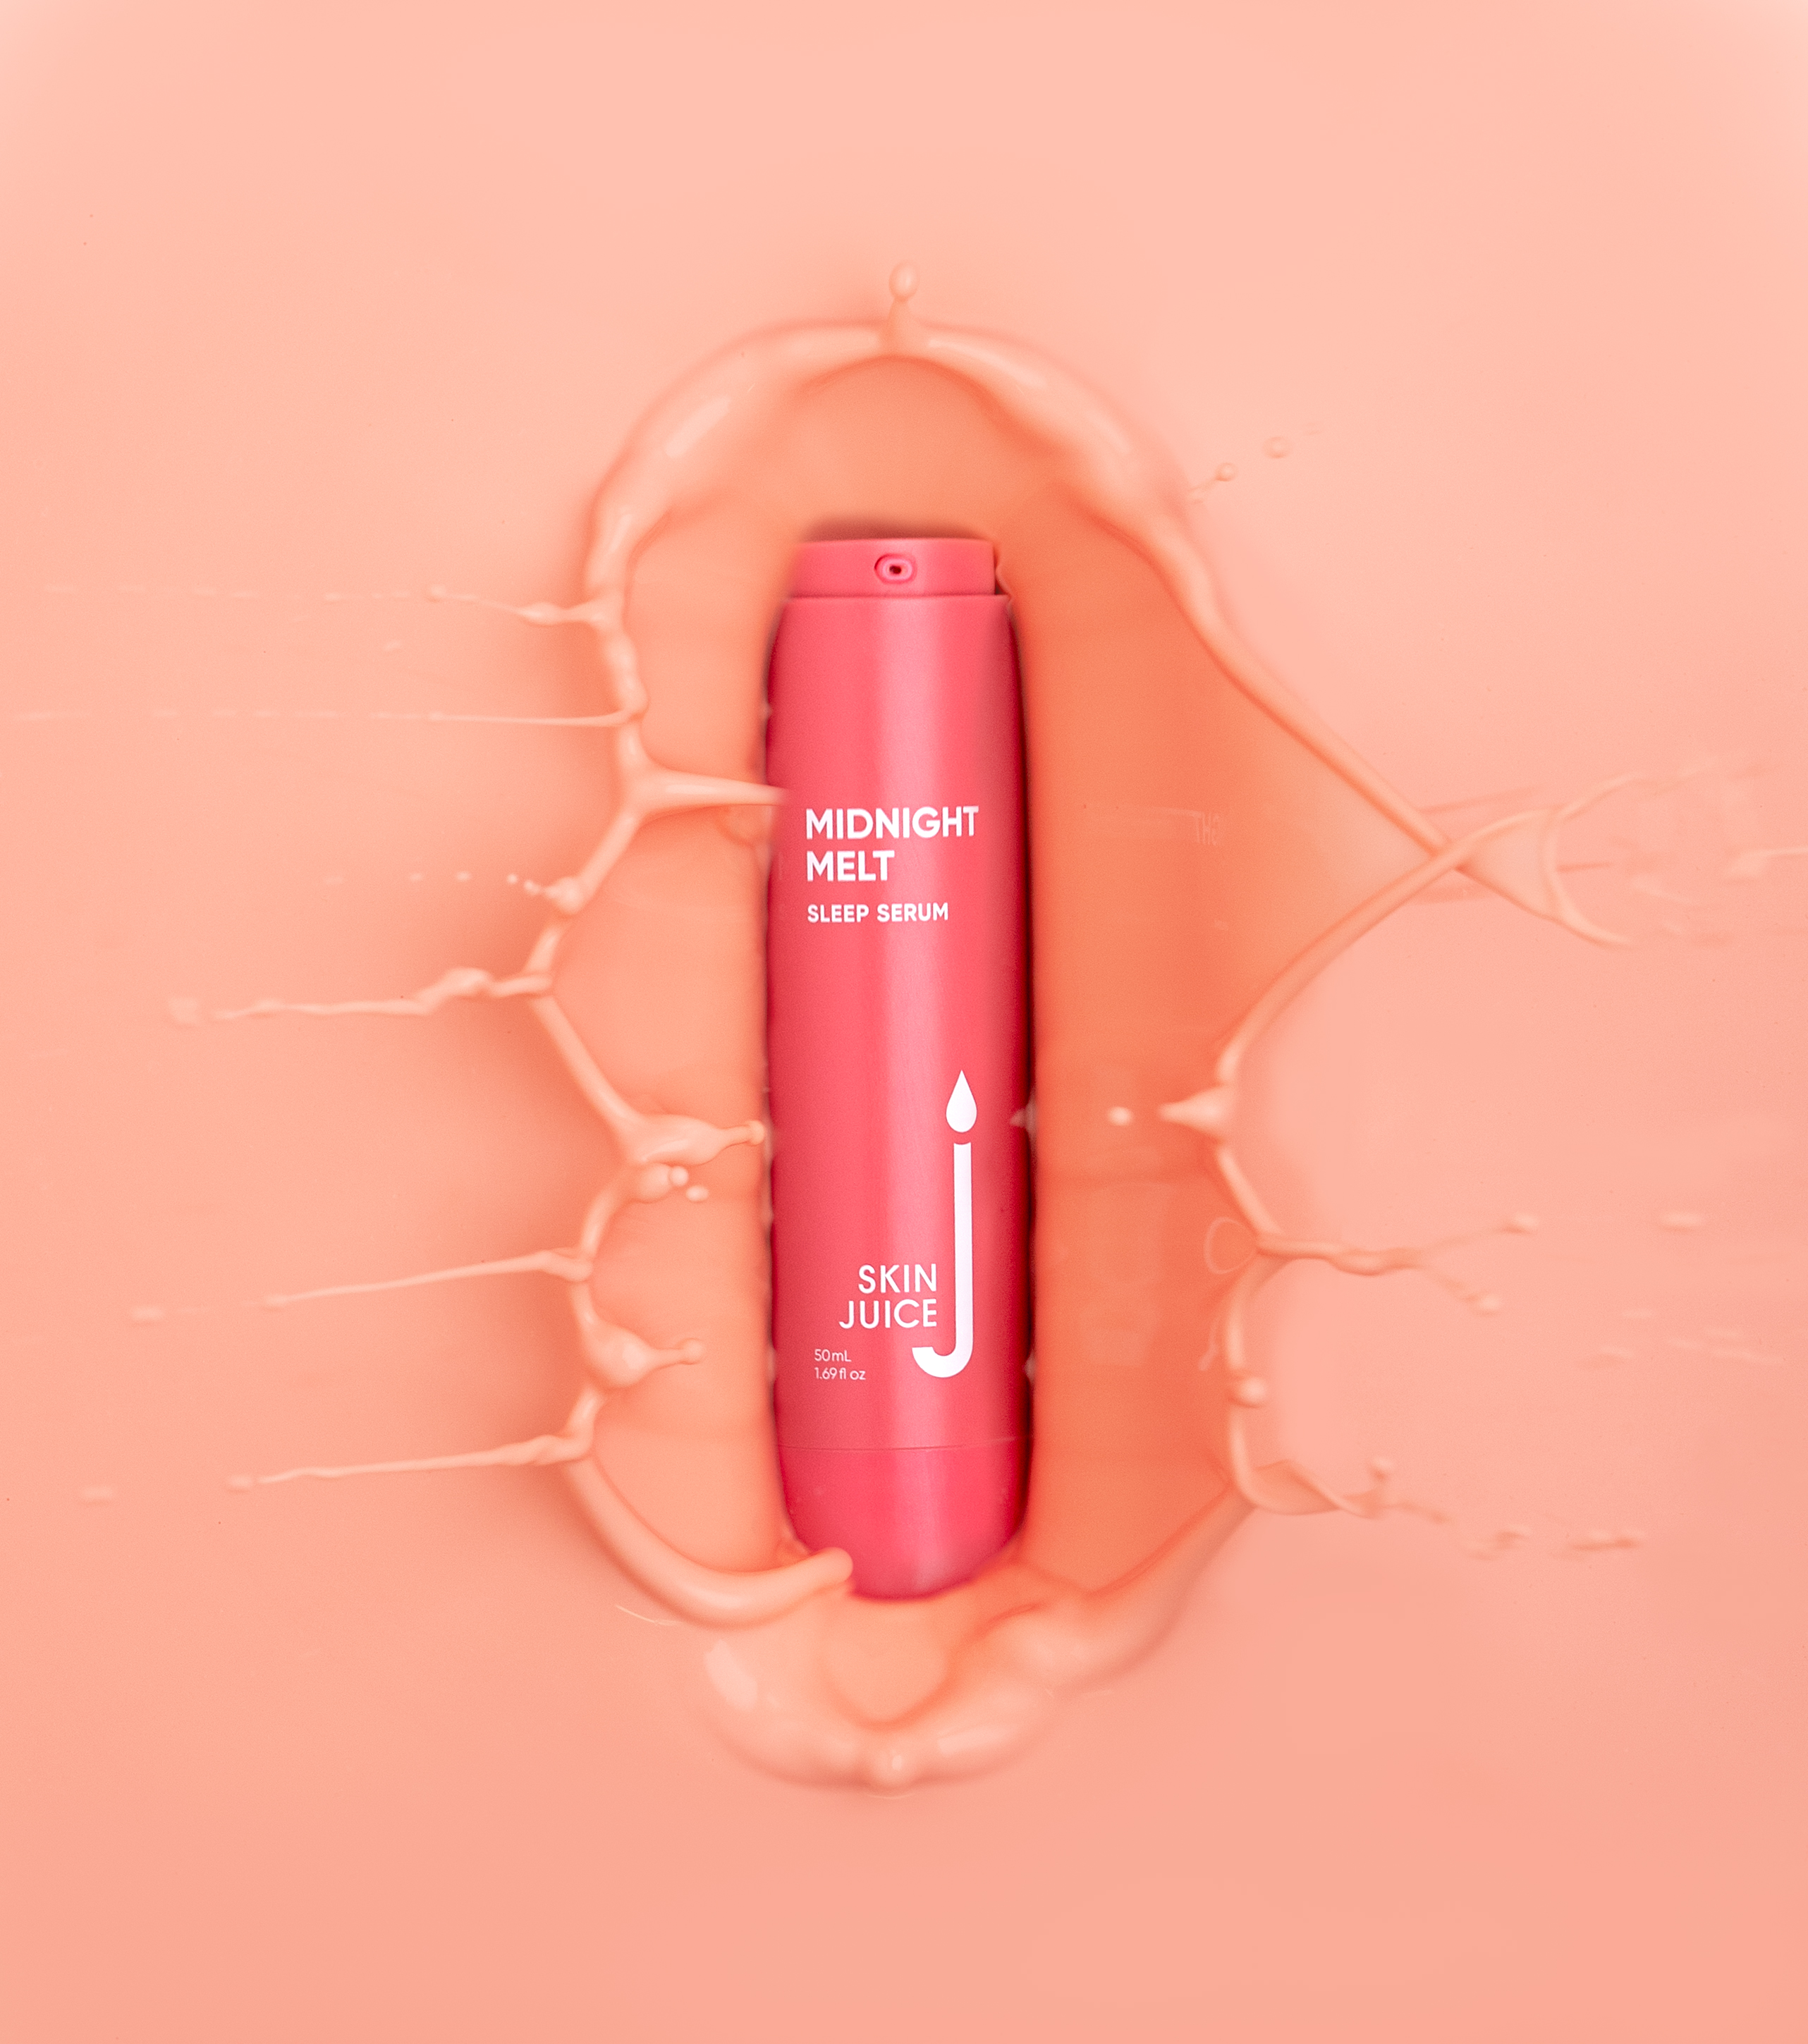
A lot of brands request us to do something similar to this photo for their own products but how much does this really cost, timewise?
Before we even go into production, let’s dive into pre-production. Pre-production is when we plan for the shoot. We plan for all the excruciating details to make sure we get exactly what we want for the photo.
The brand wanted a specific type of splash, one that isn’t too messy or thin but not too thick that we barely see any splash. They want that splash that’s right in the goldilocks zone. So, how do we achieve that?
It is the perfect consistency but we found out that it is also the most labor intensive way of mixing the texture. This is about half a day experimenting, not including shopping for props. If you add up everything from creating the plan and mood boards, shopping for props, experimenting and all the back and forth with the client, we spent roughly 3 days in pre-production.
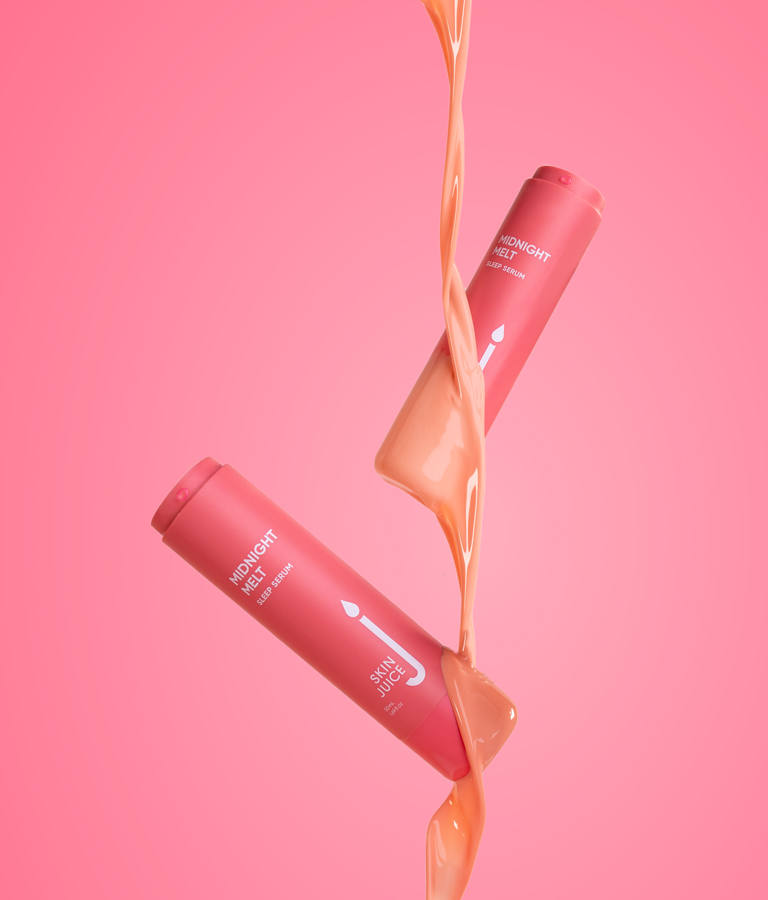
Let’s jump into production, creating this texture in a big tub of aquarium required us 8 hours to do. The sieving is the most labor intensive part of the job.
Why did we go with a big aquarium instead of a small one? Because this 1 photo is not the only photo we’re doing with the brand.
We are also doing a video where we are making the product appear from the liquid so we needed it to be deep enough for that shot.
Counting everything for just this photo, it took us more than a day to perfect this shot.
Now, let’s jump to post-production where we edit the photo.
We usually take multiple shots of this product to make sure we get the perfect splash and if we don’t get the perfect splash, we photoshop multiple splashes into the product.
For this photo, editing this took more or less 5 hours to do.
So, not all photos are done at the exact same time and require the exact same effort. Therefore, knowing the style you are going for is essential for product photographers to know before giving you the accurate quote.
The best way to communicate this with your product photographer is to show them reference photos that you like and explain what you like about these photos and what elements you want to adapt for your brand. If you can’t find any reference photos or you don’t have any ideas at all, go through your product photographer’s portfolio and pick out the photos you like and let them know what you like about them and what elements of these photos you want applied to your brand.
If you want to give your photographer the creative freedom to work on your photos, it’s best to jump in on a phone call or video call with them to hash out the details and brainstorm ideas so both of you are on the same page. A lot of the time, clients will give creative freedom but then change their mind once they have seen the final finished photos and at that point, it might be too late for everyone. It is important that the style and creative direction of your photos is clear to everyone at the very early stages of the project to avoid misunderstanding.
Additional costs - models, talents, etc.
This is by far, the biggest oversight on almost every project. Sometimes, when a project requires a model or any other talents on the shoot such as make-up artists, voice over artists, etc, the costs and budget to these is not included in your quote and will only reflect after pre-production has happened.
We usually reflect this early on in the quote to make sure you can budget for your project but that doesn’t mean it’s always accurate. Now, we can budget for 1 model and 1 make-up artist but once you see the models in pre-production, you may think you want to hire someone else to represent your brand and that’s totally fine. The only drawback to that is the budget. Not all models and make-up artists price exactly the same. They price according to their experience and exposure. Hence, it is essential to make sure you have a little bit of flexibility when budgeting for these additional costs.
We had one client who was very particular about the model and the make-up artists that she was willing to pay extra just to get the model she wanted. If this sounds like you, just put aside some money for the extra costs involved.
Location and studio costs
Sometimes, photographers bill for studio costs especially if they are renting or are in a studio lease and this will reflect in your quote. This could either be reflected in their day rates or added on to the quote. Either way, studio is the main expense product photographers have when shooting for your products.
If you request or need a lifestyle shoot, product photographers will hire locations that suit your branding. Some photographers shoot in their own homes if they have an aesthetic home but most higher end, more professional product or commercial photographers will hire a location to use for the shoot because it is safer for the equipment, there are insurances applied to each location so any damage is covered and of course, if a whole team is working on your project, it makes much more sense to hire that out.
We’ve had clients request us to do a lifestyle shoot without hiring a location and we just couldn’t do this because our own home aesthetic did not fit in with the brand. If you are looking to save money, you can offer your own home or investment homes if you have some to provide for the shoot given that you sign a waiver that the photographer is not liable for any damage in the premises because you chose to provide the location yourself instead of going through commercial hire with insurances set in place.
Majority of the commercial rentals will charge per hour around $200-$500 or more depending on the location and property value. Here is a compilation of several websites where you can find commercial rental listings for houses to compare prices.
Can you rent an Airbnb for a photoshoot or video shoot?
You’re probably thinking, okay that is way too much when I can hire an Airbnb for $300 a night so why not just do that? Sure, if Airbnb allows us to. I would suggest renting the Airbnb for 3 days, that way, you have a full day in between to do all the shoot. Check-ins in Airbnb are usually not after 2pm in the afternoon and depending on your shoot requirements, it may not be enough time.
When booking for an Airbnb, we will need to be upfront to the owner about what we intend to use the space for because not all Airbnbs are okay about using their space for commercial use. You don’t want to be kicked out during the shoot and end up wasting all the money you spent on production.
You also have to take note that Airbnbs do not have insurances in place for commercial use unless stated otherwise. So, keep this in mind when choosing your locations.
Your product photographer will usually suggest a location for you as they most likely have built partnerships with people and businesses to use their spaces for commercial hire and it is usually up to you to approve these locations.
Licensing
What is licensing in photography and commercial video production?
Let’s say you go into Apple Music and you want to buy Taylor Swift’s music so you can download it and use it. Does that mean you can use the music for commercial use without copyright breach? No. You’d have to pay more if you want to use it commercially so you can get the commercial license from Taylor Swift or the recording label who owned her older versions of her music.
Another example is Dua Lipa’s custom song Dance The Night for the movie Barbie. Mattel, the name of the corporation who created Barbie, has requested Dua Lipa to create a song specifically for Barbie but that does not mean they own the music of Dua Lipa. Instead, they have the license to use the music for their commercial use and every time Barbie gets played or her music music gets played in Barbie, she gets paid for it.
This is what licensing means and it applies to commercial photographers as well. Even if you paid your photographer to create photos for your brand, in the face of the law, your photographer still owns the copyright to those photos. The photographer will give you a legal license to use the photos for your commercial use.
The price for this license depends on the use of the images, billboards in busy streets like New York will cost higher than just a print on the packaging. You need to be upfront about your use of photos to your photographer so they can give you appropriate licenses for it and you avoid any legal disputes in the future if you breach copyright.
These are 5 factors that contribute to pricing your product photography prices.
Like I said, it is hard to tell you exactly how much everything will cost but you can set aside some budget when you think about all these factors.
The way we quote photography and video prices in Collabarts is that we give the clients our day rates and explain all the factors affecting their custom quote.
So, how much does product photography costs for Collabarts?
10 Photos will cost around AU$2,000 - AU$5,000 depending on the requirements of the brand. Some photographers have much higher prices than these and some new photographers will price lower.
Who you hire is totally up to you. The more a photographer charges, the more they have invested in their craft. Which means, a lot is at stake. They might have bigger teams and have their own stylist or they might have a lot of professional equipment that caters to every need of your photos that they need to include this in their quote or profit margin.
If you are price sensitive, make sure you communicate your budget upfront. It is not something you should be embarrassed about because it is important that your photographer knows the limits to what you can afford and create a proposal that accommodates to your budget. If they can’t accommodate your budget, most photographers will be happy to recommend someone who can.
I hope this gives you a little bit of clarity on what to expect in terms of pricing. If you want to know how much we quote for your ideal project, you can fill out this form and we will send you a proposal with a quote. Otherwise, jump in a meeting with us and hash out the details of your project.
